Just Enough HTML
Let’s talk about structure – you need it to build anything, including websites. To describe the structure of our design to a web browser, we use HTML, which is short for Hypertext Markup Language – that might be useful the next time you’re on Jeopardy!
This is the part of Design With Code that starts to feel a bit technical, but remember, we’re going to learn just enough to pick up momentum. I think it’s useful to understand that HTML was created to describe documents on the internet, and while it has learned a lot of new tricks over time, understanding how it “thinks” is super useful.
Ready? Let’s go!
First, let’s get set up with a little playground so you can have a tight feedback loop while you learn:
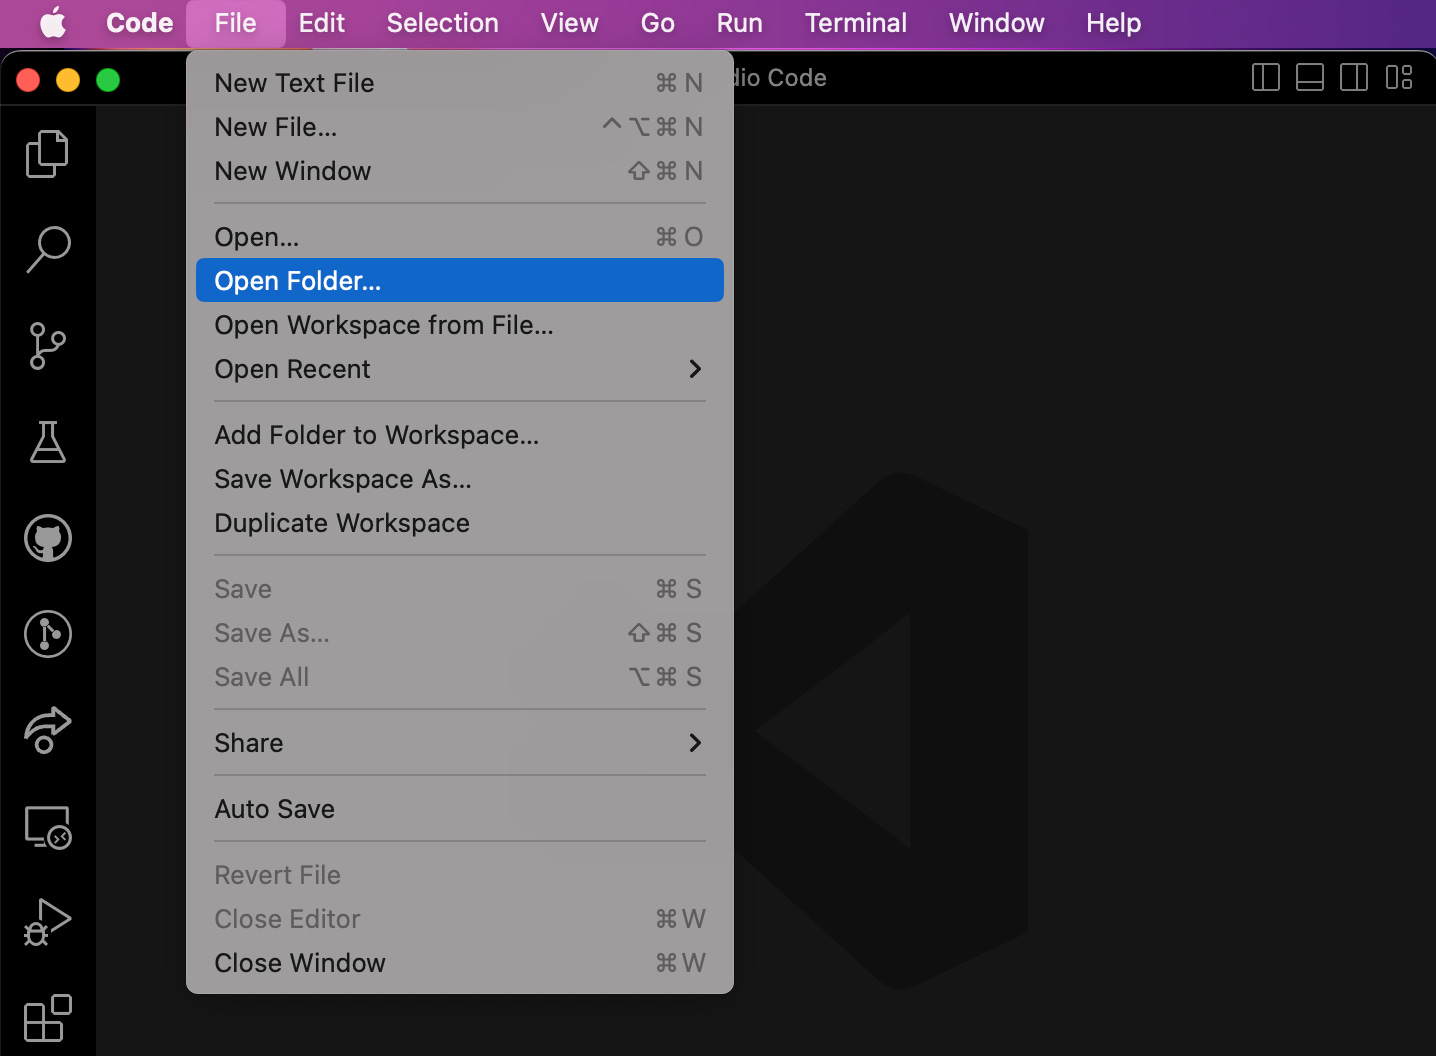
Open up your code editor – VS Code. If you don’t have it already, download it.
From the File Menu, select Open Folder…
In Just Enough Terminal, we made a folder called “Projects.” Find that folder and make a new one inside it called
dwc-html. We’ll do our work in this folder.You should now be looking at a VS Code Window that says “dwc-html” in the menu bar.
From the file menu, select “New File...” then type
index.htmlinto the prompt in VS Code.You should now see a blank document called
index.html!Into
index.htmltype the following and hit save.<!DOCTYPE html> <html> <head> <title>Hello HTML</title> </head> <body> <p>Look at me!</p> </body> </html>This is your very first HTML page. Congrats!
Open Terminal and navigate to the
dwc-htmlfolder. With the following commands. Don't forget to hit return after each line:cd Projects cd dwc-htmlYour terminal should look something like this, showing you you’re in the correct folder:
Okay, here’s the fun part. Let’s turn your computer into a local web server with one command. Into your terminal, type the following and hit return:
npx viteTo pull up a list of helpful shortcuts, hit the
hkey. Now your terminal should look like this:Type
oto open up your HTML page in a web browser, or typehttp://127.0.0.1:5173into your web browser of choice.All-in-all your screen should look something like this right now:
Here, I’ve got my editor and browser side-by-side and my Terminal running a local web server thanks to an amazing project called Vite. Try changing “Look at me” to “We did it!” in VS Code – then hit save. You should see your web browser magically update.
Ladies and gentlemen, we have a feedback loop.
Anatomy of an HTML document
Ok, Now that we’re up and running, let’s understand what we have so far, line by line.
<!DOCTYPE html>☝️This line will be at the top of every HTML document. Predictably, it’s called a “doctype.” Feel free to read up on it, but you can just take it as rote that you’ll need this line to tell the browser what it's looking at.
<html>☝️This is the opening HTML tag! Tags in HTML have to open and close. You can tell a tag by its distinctive pointy brackets.
<head>☝️This is the opening head tag. You'll notice that it's nested inside our html tag, making it html's first child. The head of an HTML document is the way we communicate important metadata about our page to the browser. None of this is shown on the page itself. It has specific child tags, one of which is…
<title>Hello HTML</title>☝️Here, we have the title tag. You can see that it opens and closes, and in between, we put the content we want the browser to show. In this case, it's Hello HTML. In the screenshot above, you may have noticed that the title is in the browser tab!
</head>☝️This is the end of the head tag. See that forward slash? That indicates it's the closing tag. On to the stuff that people can see!
<body>☝️This is the opening body tag. It’s html’s second child. Just like head, it’ll eventually close. Everything inside the body is the part of the document that the web browser presents to the user. We'll spend pretty much all of our time working inside the body tags.
<p>Look at me!</p>☝️This is a paragraph element! An “element” refers to an opening tag, a closing tag, and the tag's content (if there is any). As you might have worked out, the p tags stand for “paragraph” – this code stuff isn't too bad right? This line prints out “Look at me!" in your browser for the world to see.
</body>☝️It's the closing body tag I promised you earlier. It lets the browser know when we're done showing content to the user.
</html>☝️Finally, we get to the closing html tag. This lets the browser know we're done with our document. What an adventure!
The tags you need to know
There are over 140 tags in HTML, but you can do pretty much everything you want with only a handful. We’ll use these tags to describe the hierarchy of our content to the browser. This isn’t quite designed, but we get some helpful default styles from the browser for free. Feel free to try these in your code editor as we go!
Headings
There are six levels of headings from <h1> to <h6>. You can use them to represent a logical hierarchy, like so:
<h1>Dogs</h1>
<h2>Hounds</h2>
<h3>Dachshunds</h3>
<h4>Smooth</h4>
<h4>Long-haired</h4>
<h4>Wire-haired</h4>
Paragraphs
It’s our old friend, the <p> tag! It is meant to hold running text. You know, paragraphs.
<p>The dachshund, also known as the wiener dog, badger dog, and sausage dog, is a short-legged, long-bodied, hound-type dog breed. The dog may be smooth-haired, wire-haired, or long-haired and comes in various colors.</p>Hyperlinks
This is the internet. We’re going to want to move around using links. For that, we’ll use the <a> tag, which stands for “anchor.” Why is it called anchor? I don't know, go with the flow on this one:
<a href="https://en.wikipedia.org/wiki/Dachshund">All about Dachshunds</a>Oh, look, new stuff! The a tag doesn't do much without the href attribute. Pretty much all tags can have attributes, but href (short for hypertext reference) is special to the a tag. As you can see in the example above, you can assign a URL to href by using an equal sign and quotes. The content between the tags will be your link text, like so:
Images
A picture is worth 1,000 words or something – so we’re going to need the img tag:
<img
src="https://upload.wikimedia.org/wikipedia/commons/c/c8/Short_haired_dachshund_in_race.jpg"
  alt="A short-haired dachshund running in a race"
/>
Here we can see that the image tag needs two attributes: src, which is a link to the image you're trying to show, and alt, which is an alternate description of the image that will appear if the image fails to load and will be read by screen readers used by non-sighted users.
Curiously, you’ll see that the img tag ends with />. Not the </img> you were probably expecting. This is a self-closing tag, which doesn’t accept content like the other tags we've used so far.
Div
What we have so far is great, but we’ll eventually want to group elements to style them. For this, I’d like to introduce you to your new best friend, div.
You can think of the div tag, short for “division,” as a box that you can put content in. You'll notice that div will make a new line in your document.
<div>
  <h3>Coat types</h3>

  <p>
    There are three dachshund coat varieties: smooth coat (short hair),
    long-haired, and wire-haired.
  </p>

  <h4>Smooth</h4>

  <p>Smooth dachshunds have short, smooth coats, and they are my absolute favorite!</p>

  <h4>Long-haired</h4>

  <p>Longhaired dachshunds have a silky coat and short featherings on legs and ears.</p>

  <h4>Wire-haired</h4>

  <p>Wire-haired dachshunds are the least common coat variety in the United States (although it is the most common in Germany) and the most recent coat to appear in breeding standards.</p>
</div>
If you try this code, you’ll see it has no visible effect. These tags are just for us designers to use to add more structure where we need it.
Alright, that was a lot. Way to power through. Keep playing around; maybe figure out how to add a list to your HTML, maybe a video, and see how far you can go! Whenever you are done, type q in your terminal to close your Vite server.
Don’t forget – you can join us in the Design With Code Slack to get help or hang out with like-minded people. One last thing! What did you think of Just Enough HTML?


